

Inkscape is a great open source software to create high quality vector graphics. It was really surprising for me, when I found out that some designers are doing amazing job with this piece of software. It had truly surpassed my expectations. At first I thought, I will write a single post which show 3 techniques to draw dotted circles in Inkscape, but then I realized it will be too long and clumsy to accommodate all 3 techniques in a single article. So, I have decided to write separate post with separate techniques & this is the 1st one of the three. Whatever, today I am going show the first technique to draw a dotted circle. In this post I will demonstrate the 1st technique of 3, other 2 techniques will be posted after this.
Technique 1
Draw a perfectly round circle by clicking the “Circle, Ellipses and Arcs Tool”. To get a perfectly round circle you must press “Ctrl+Shift”, while drawing the circle. You will get a perfectly round circle just like the one below.

Now we need to turn this circle to path. To do that, you need to click Path > Object to Path or press Shift+Ctrl+C. At this stage, we will make the fill of the circle to “none” & give it a stroke of same color. To do that, you can use either “Fill & Stroke” toolbox or the color pallet bar from below. It is important to mention here that, if you just click on any color from the color pallet bar the object will be filled with that color & if you click on any color from the pallet bar by pressing “Shift”, it will change the stroke color of the object. We have changed the fill color of our circle here to “none” & the stroke color to this (#008066). It is now just like the image below.

Now, duplicate the circle by right click when the circle is selected & click Duplicate or just press Ctrl+D on keyboard to duplicate. After duplicating, press Ctrl+Shift and click any corner handle to shrink down the duplicated circle just like the image below.

We will select both objects now. Click Extensions > Generate from Path > Scatter. A new Scatter toolbox will pop-up. Let’s fill the field “Space between copies” with value of 5. You can also enable “Live preview” from left bottom corner of the toolbox. Hopefully, you’ll get your desired dotted circles by now. if the spaces between the dots are not even, you can enable “Follow path orientation” & “Stretch spaces to fit skeleton length” to see the dotted circles are perfect. Now click “Apply” and close the “Scatter” window.
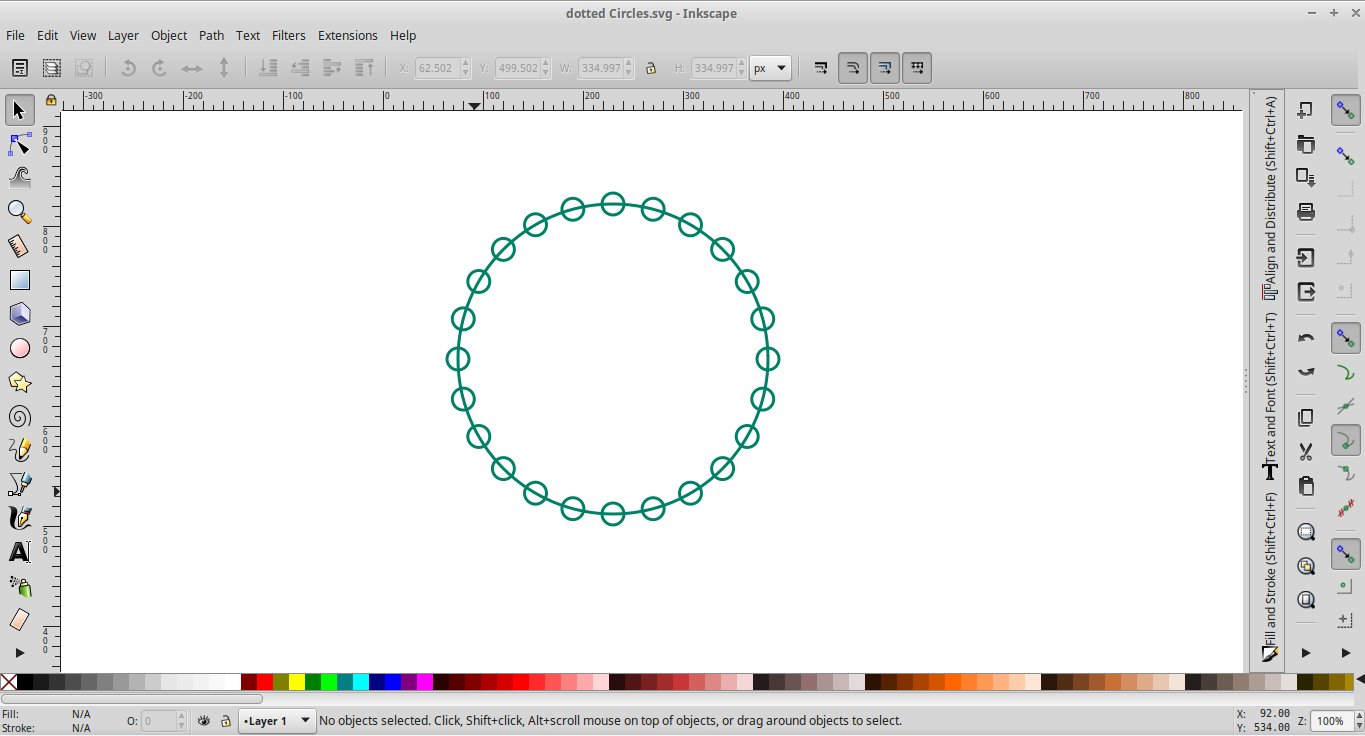
We are almost done with the dotted circle here. Now you can drag the dotted circle & delete the original circle. You can also fill the dots with your desired color. The final output is below.

So, here we are with our final dotted circle in Inkscape. Now you can play with the circle as you like. With this shape, you can do whatever you want. I hope you have enjoyed the 1st technique with more to come on this topic. I believe you will love those techniques too. If you love the post please share and let us know your valuable opinion what do think & how we can improve.
